Using a provided cloud instance
We are providing 12 cloud environments (VMs/virtual machines) for the training at hand. The machine configuration is
- 24 VCPUs
- 128 GB RAM
- 500 GB disk storage
running Ubuntu 24.04.
These VMs have already been provisioned with an AOSP source tree based on Android 15 and the source code has already been built for the target “aosp_cf_x86_64_auto-trunk_staging-userdebug”. Furthermore, the cuttlefish emulator has been installed.
Note
To use the cloud instances you need an SSH client. On a modern Windows installation, the OpenSSH client is available as part of the operating system. If that is not the case, please click the above link for further instructions. We do not recommend using Putty, because we will need to forward many network ports later on. We provide an OpenSSH client configuration file that accomplishes that.
Coordinate the IP Address assignment with the trainers. Each participant will receive a slip of paper with a unique IP address of a cloud instance. You will also receive a password. Sharing an AOSP build tree will not work.
Note
The VMs will be decommissioned once the training is over. Therefore, feel free to customize them to suit your needs.
Note
The necessary tools like repo and the required configuration, such as the one for git, has already been performed on the server.
Using VS Code with the VM (recommended)
To use the cloud instance, connect to it as a Remote in Visual Studio Code. First, ensure the Remote - SSH (ms-vscode-remote.remote-ssh) extension is installed.
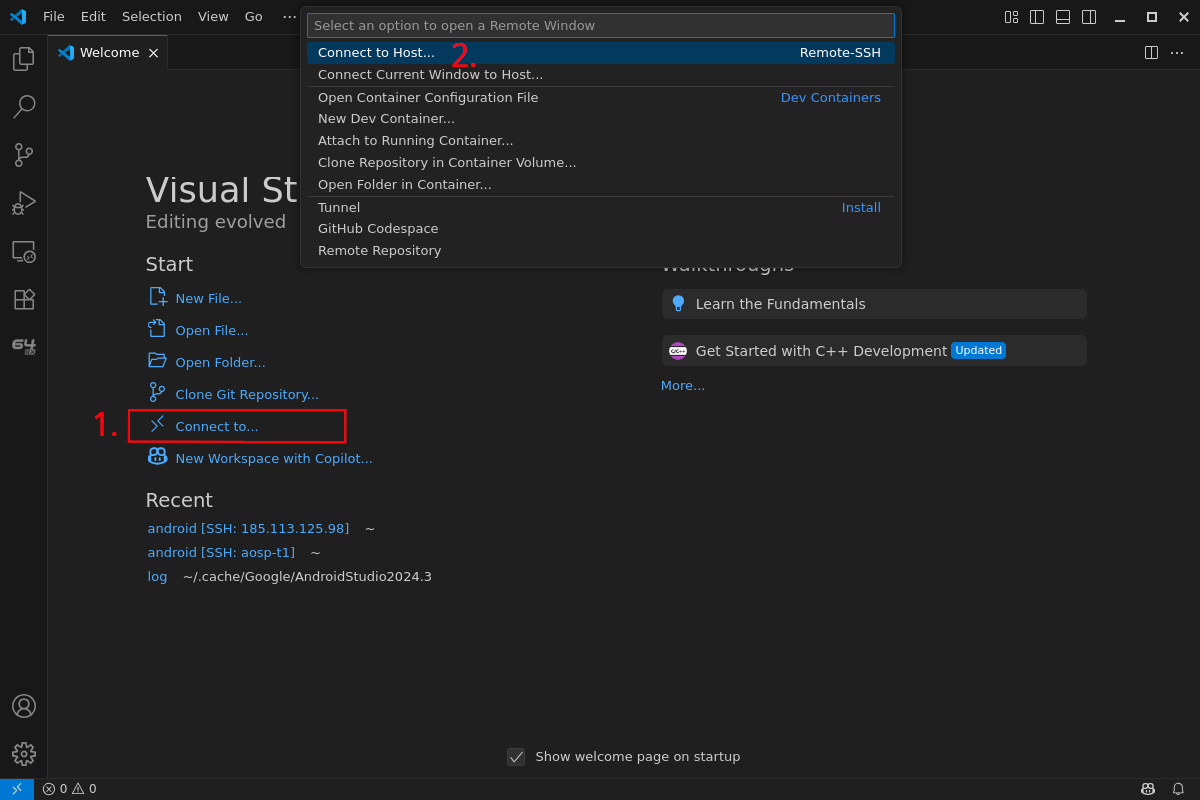
Then, select "Connect to..." (1.) on the Welcome tab, then select "Connect to Host..." (2.) from the options at the top of the window.
Enter ubuntu@<your-ip-address>, replacing <your-ip-address> with the IP address of the VM assigned to you. You will then be prompted for the password, enter the password from the piece of paper.
VS Code will then automatically install the remote tools on the VM and open a window connected to the Remote. It will show in the lower left corner that it is now connected to the Remote ("SSH: 185.113.125.xxx"). In this window, you can now select "Open Folder..." (1.) from the Welcome tab and then select the "android" folder from the list at the top of the window (2.). You should then click "OK" (3.).

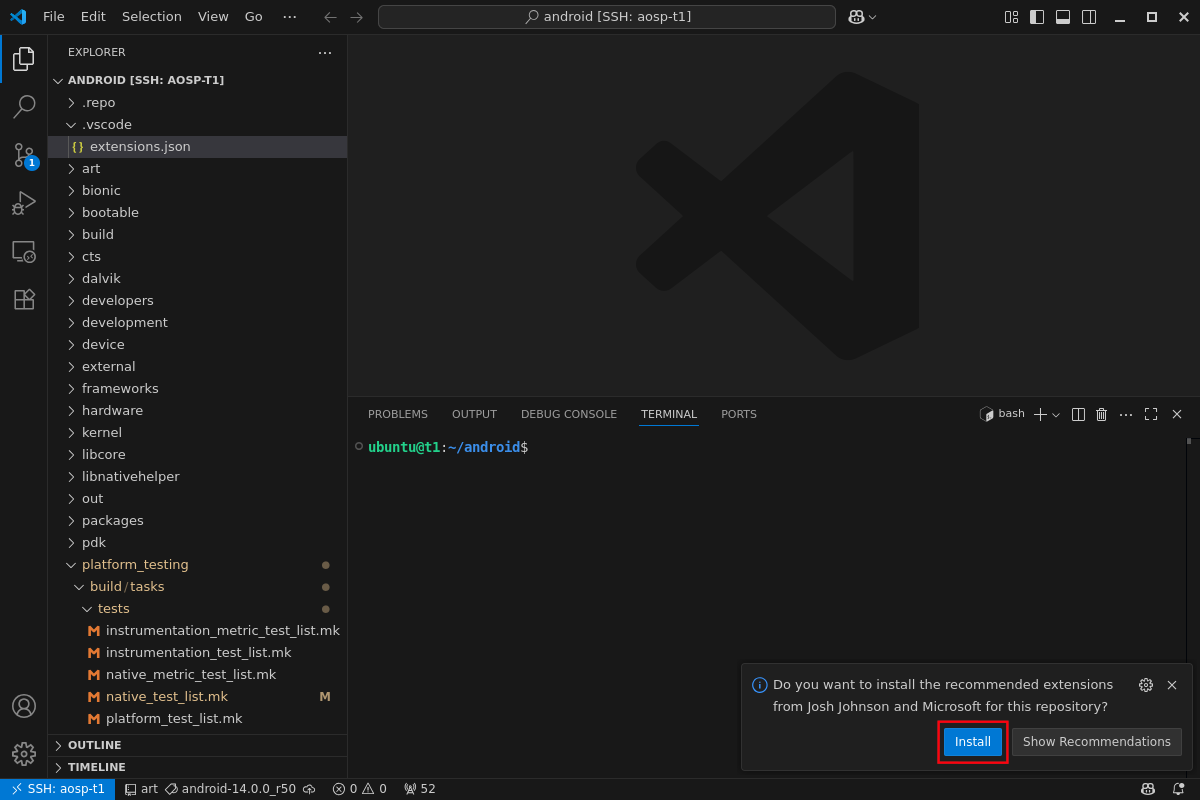
After loading the android folder, VS Code will ask if you want to install the recommended extensions for this repository. Select "Install" to install the recommended extensions.
VS Code is now set up for the android workspace on the VM. You can use the VS Code Explorer to navigate the files in the android source tree and open files for viewing and editing.
The terminal window at the bottom can be used to execute commands on the VM, which you will need to do during this training. If you need multiple terminals, you can add additional terminal tabs by clicking the "+" icon on the top of the terminal pane.
Working without VS Code
Configure your SSH client to connect to the IP address using the username ubuntu. SSH is configured to use the default port 22. A Linux shell example is
ssh ubuntu@185.113.125.XXXAfter you connect successfully, execute a ls command and look at the files in the home folder.
Terminal multiplexing
To have multiple shells in a single SSH session, you can use screen or tmux. Both are already installed.
Tips & Tricks
ssh public key
To avoid retyping the password on every login, you can also add one of your personal public ssh keys to the server. We will delete the virtual machine after the training.
(Public) IP Address
You can find the IPv4 address of this server in the file ip_address.txt. Use cat to display the file contents:
cat ip_address.txt